Azure SSO is cool
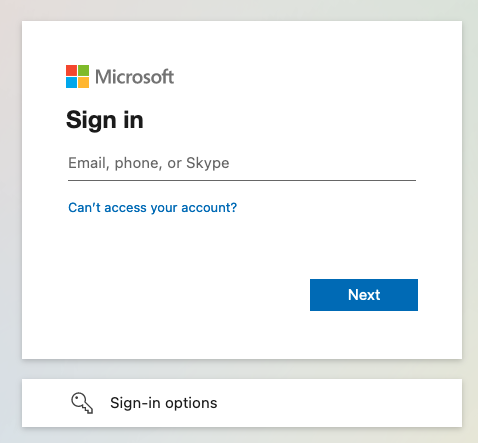
Have you ever seen one of these login forms?
 Microsoft Azure Single Sign-on
Single sign-on (SSO) is a pretty slick feature you can leverage if you make use of Azure Active Directoy. While I might write an article later about how to set this up, I want to explain something significant about Azure’s SSO.
Let’s talk about the difference between authentication and authorization.
Authentication vs. Authorization
When you sign into one of these SSO forms, quite a few things happen.
Authentication
This step simply confirms that you are who you say you are. If I supply the correct username and password for my account, the authentication step should just say, “yep, let him in”.
Authorization
After I’m confirmed to be me, the next step is checking if I have permission to access the underlying resource. By default in Azure SSO, any user that can authenticate can access the resource behind it. This means that you should handle permissions and role-based access control in your application, which is typically the correct thing to do.
Jupyterhub
Jupyterhub is a platform where authorized users are presented with containerized notebooks. You can configure various types of authentication, and we’ve opted to use Azure SSO. The user navigates to the Jupyterhub cluster, is presented with an Azure SSO prompt, logs in, and their username attribute is passed back to the cluster. Jupyterhub now compares that username to its list of authorized users, and allows or denies access to the cluster.
The issue with managing users in Jupyterhub is that it requires a modification of the application settings and an application restart. In our case, since we’re running this in Kubernetes, it requires managing a list of users in a YAML manifest, then deploying those changes using Helm.
Since we’re not handling any role-based controls, we’re simply granting access or not, wouldn’t it be nice if we could leverage Azure SSO to handle the authorization stage as well?
Azure Enterprise Applications
The enterprise application is the component in Azure that handles authentication, as well as what account attributes are released to the underlying application. Each enterprise application also creates an associated App Registration, which you can think of as a consumer of the enterprise application. The app registration holds configuration like callback settings for when your user authenticates successfully, and token information that you configure your application with, to be able to talk to the enterprise application.
Enterprise applications also have the ability to manage who has access to the enterprise application, by modifying a user list. There’s even an API to add users to the enterprise application.
So what if we used the enterprise application user list as an authorization source instead of Jupyterhub’s user list? We could configure Jupyterhub to simply allow any user that successfully authenticates. Let’s do it!
Configuration
First off, let’s look at what pieces of information Jupyterhub requires for Azure AD Authentication:
1
2
3
4
5
c.AzureAdOAuthenticator.oauth_callback_url = "https:///hub/oauth_callback"
c.AzureAdOAuthenticator.tenant_id = ""
c.AzureAdOAuthenticator.client_id = ""
c.AzureAdOAuthenticator.client_secret = ""
c.AzureAdOAuthenticator.username_claim = "preferred_username"
The
oauth_callback_urlis where the Azure SSO form will redirect the user if they successfully sign in. The URL needs to match on both the cluster as well as in the Azure App Registration.The
tenant_idis the ID of your Azure Active Directory tenant. You can find this in the properties of the overall “Azure Active Directory” service.The
client_idandclient_secretare properties of the App Registration attached to your Enterprise Application.The
username_claimis the name of the property that should be referenced to find the username of the user.
App Registration Setup
client_id and client_secret
The client_id is easy, it’s labeled as the “Application (client) ID” in the App Registration properties. To obtain the client_secret, navigate to “Certificates & secrets”.
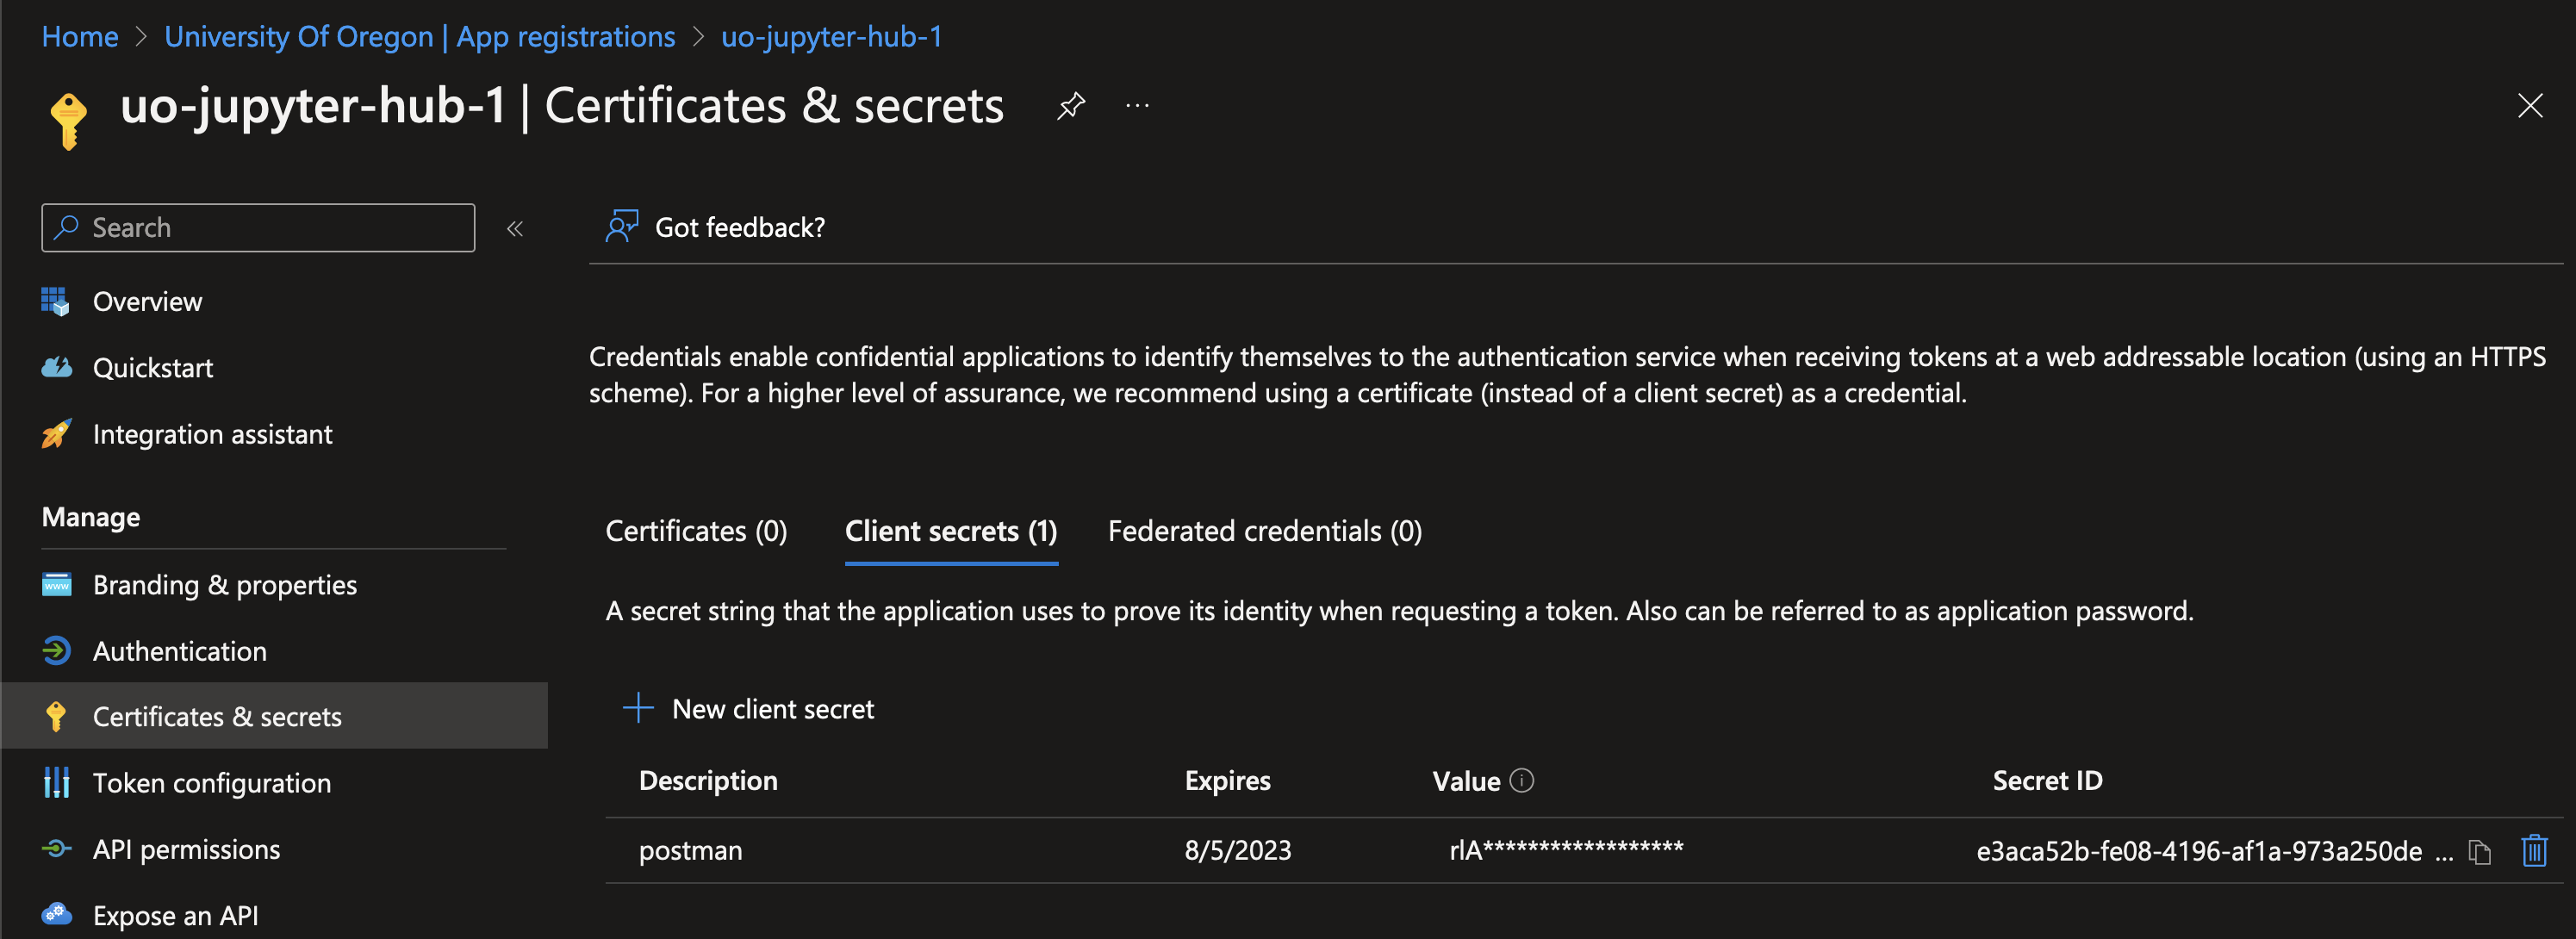
You’ll want to create a new secret using the “New client secret” button. The secret only takes two pieces of information: a description and an expiration length.
Just after you’ve created that secret, it should be available in plaintext under the “Value” field in the secrets table. Make sure to copy that value and save it to the password solution of your choice. Once you navigate away from this page, it will be hidden forever.
oauth_callback_url
Under the “Authentication” category, you’ll find the area to configure your callback URL.
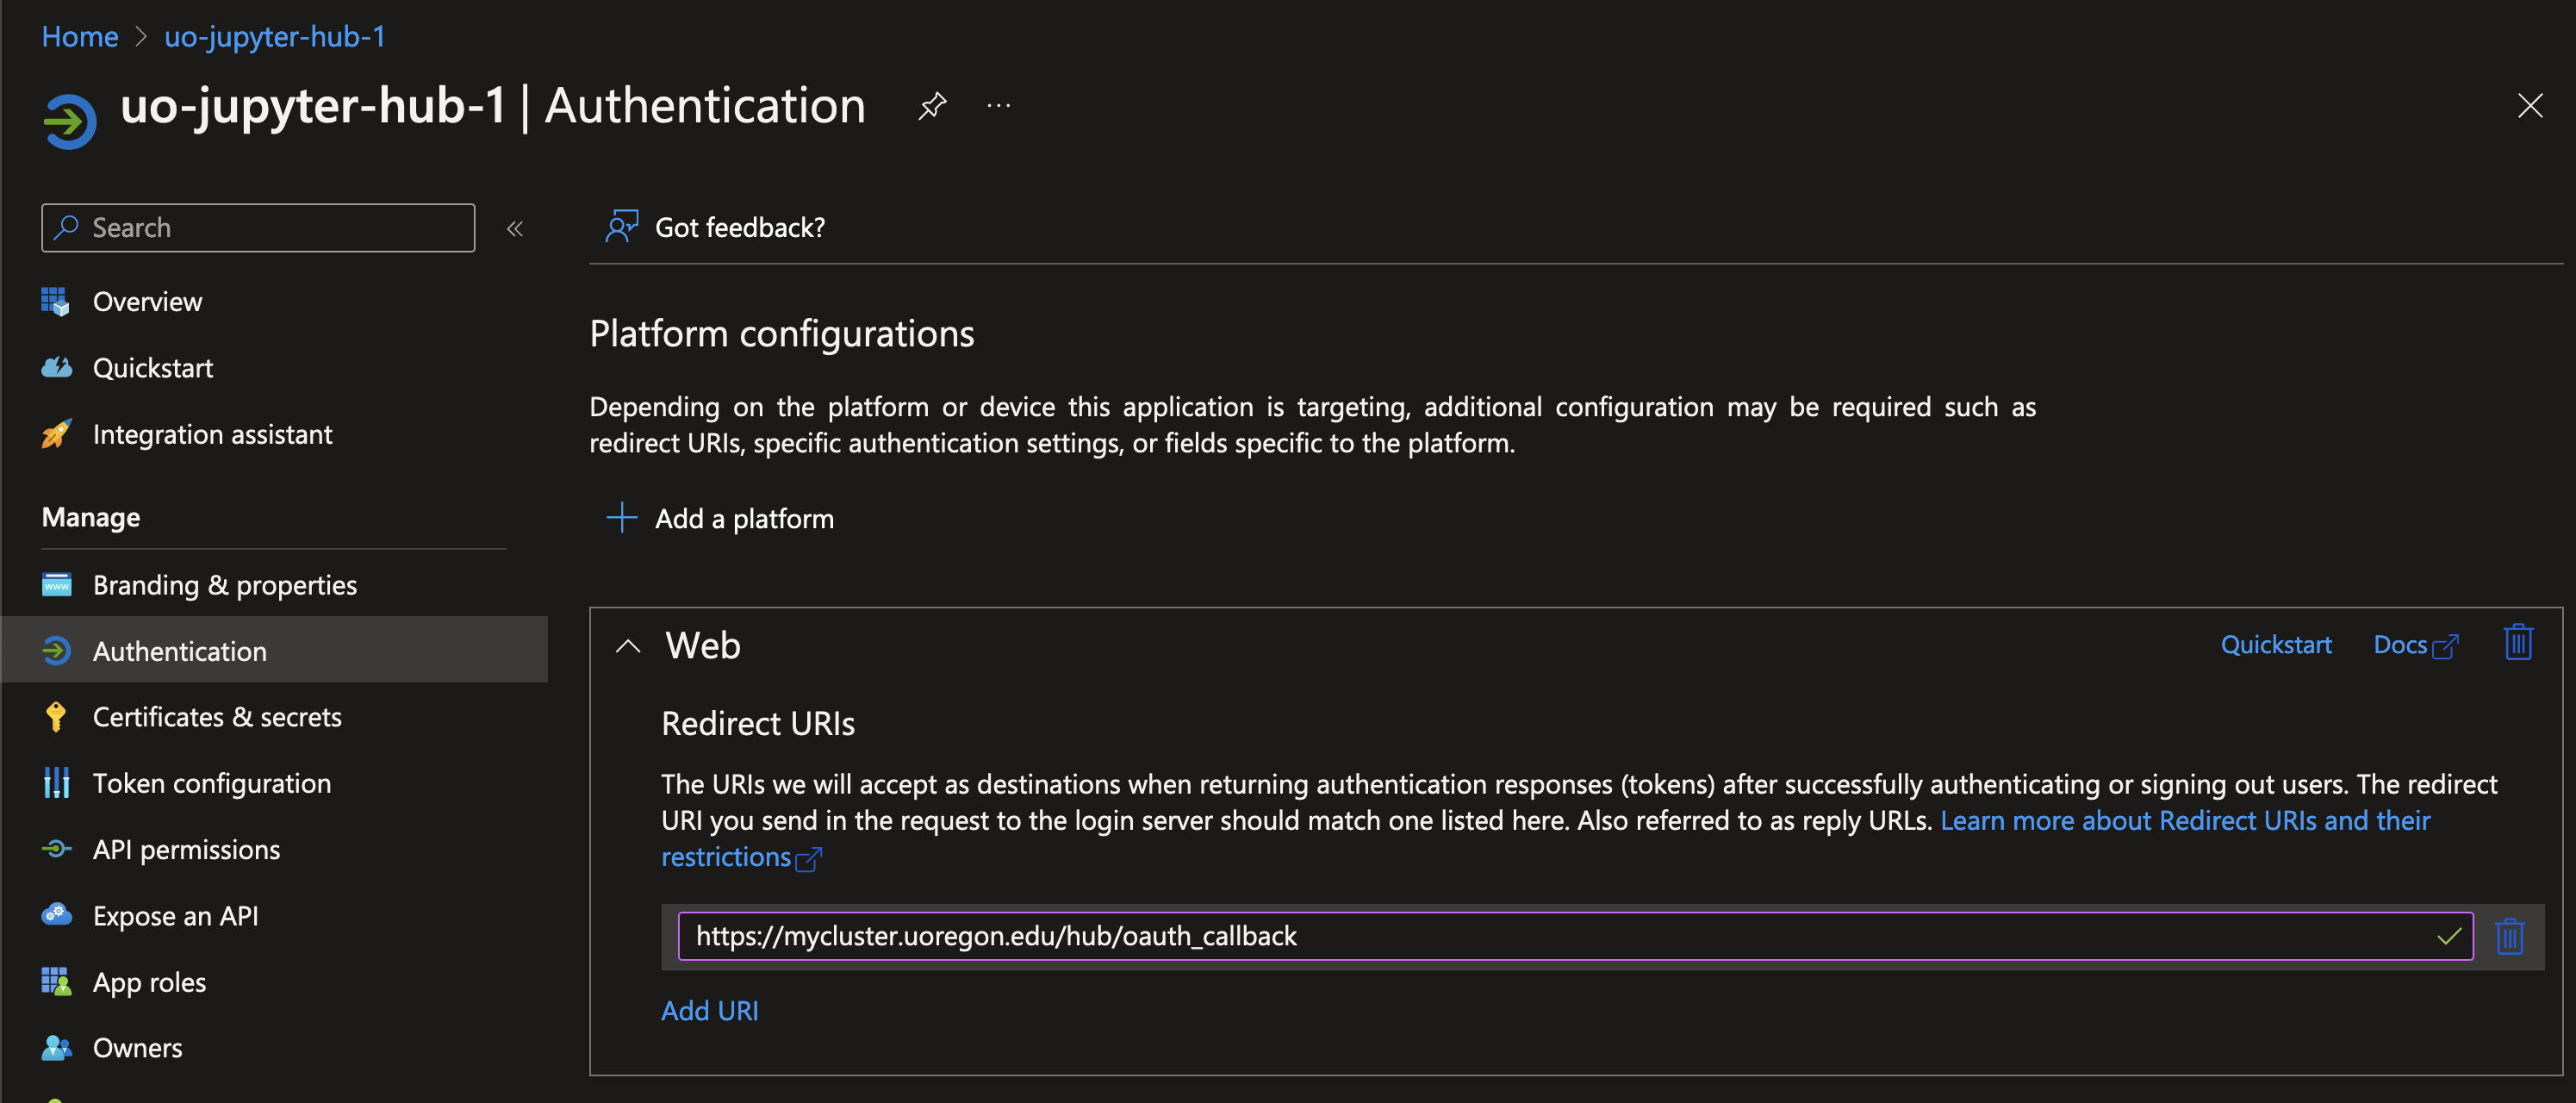
Enter the URL from above into the “Redirect URIs” section, replacing `` with your cluster name.
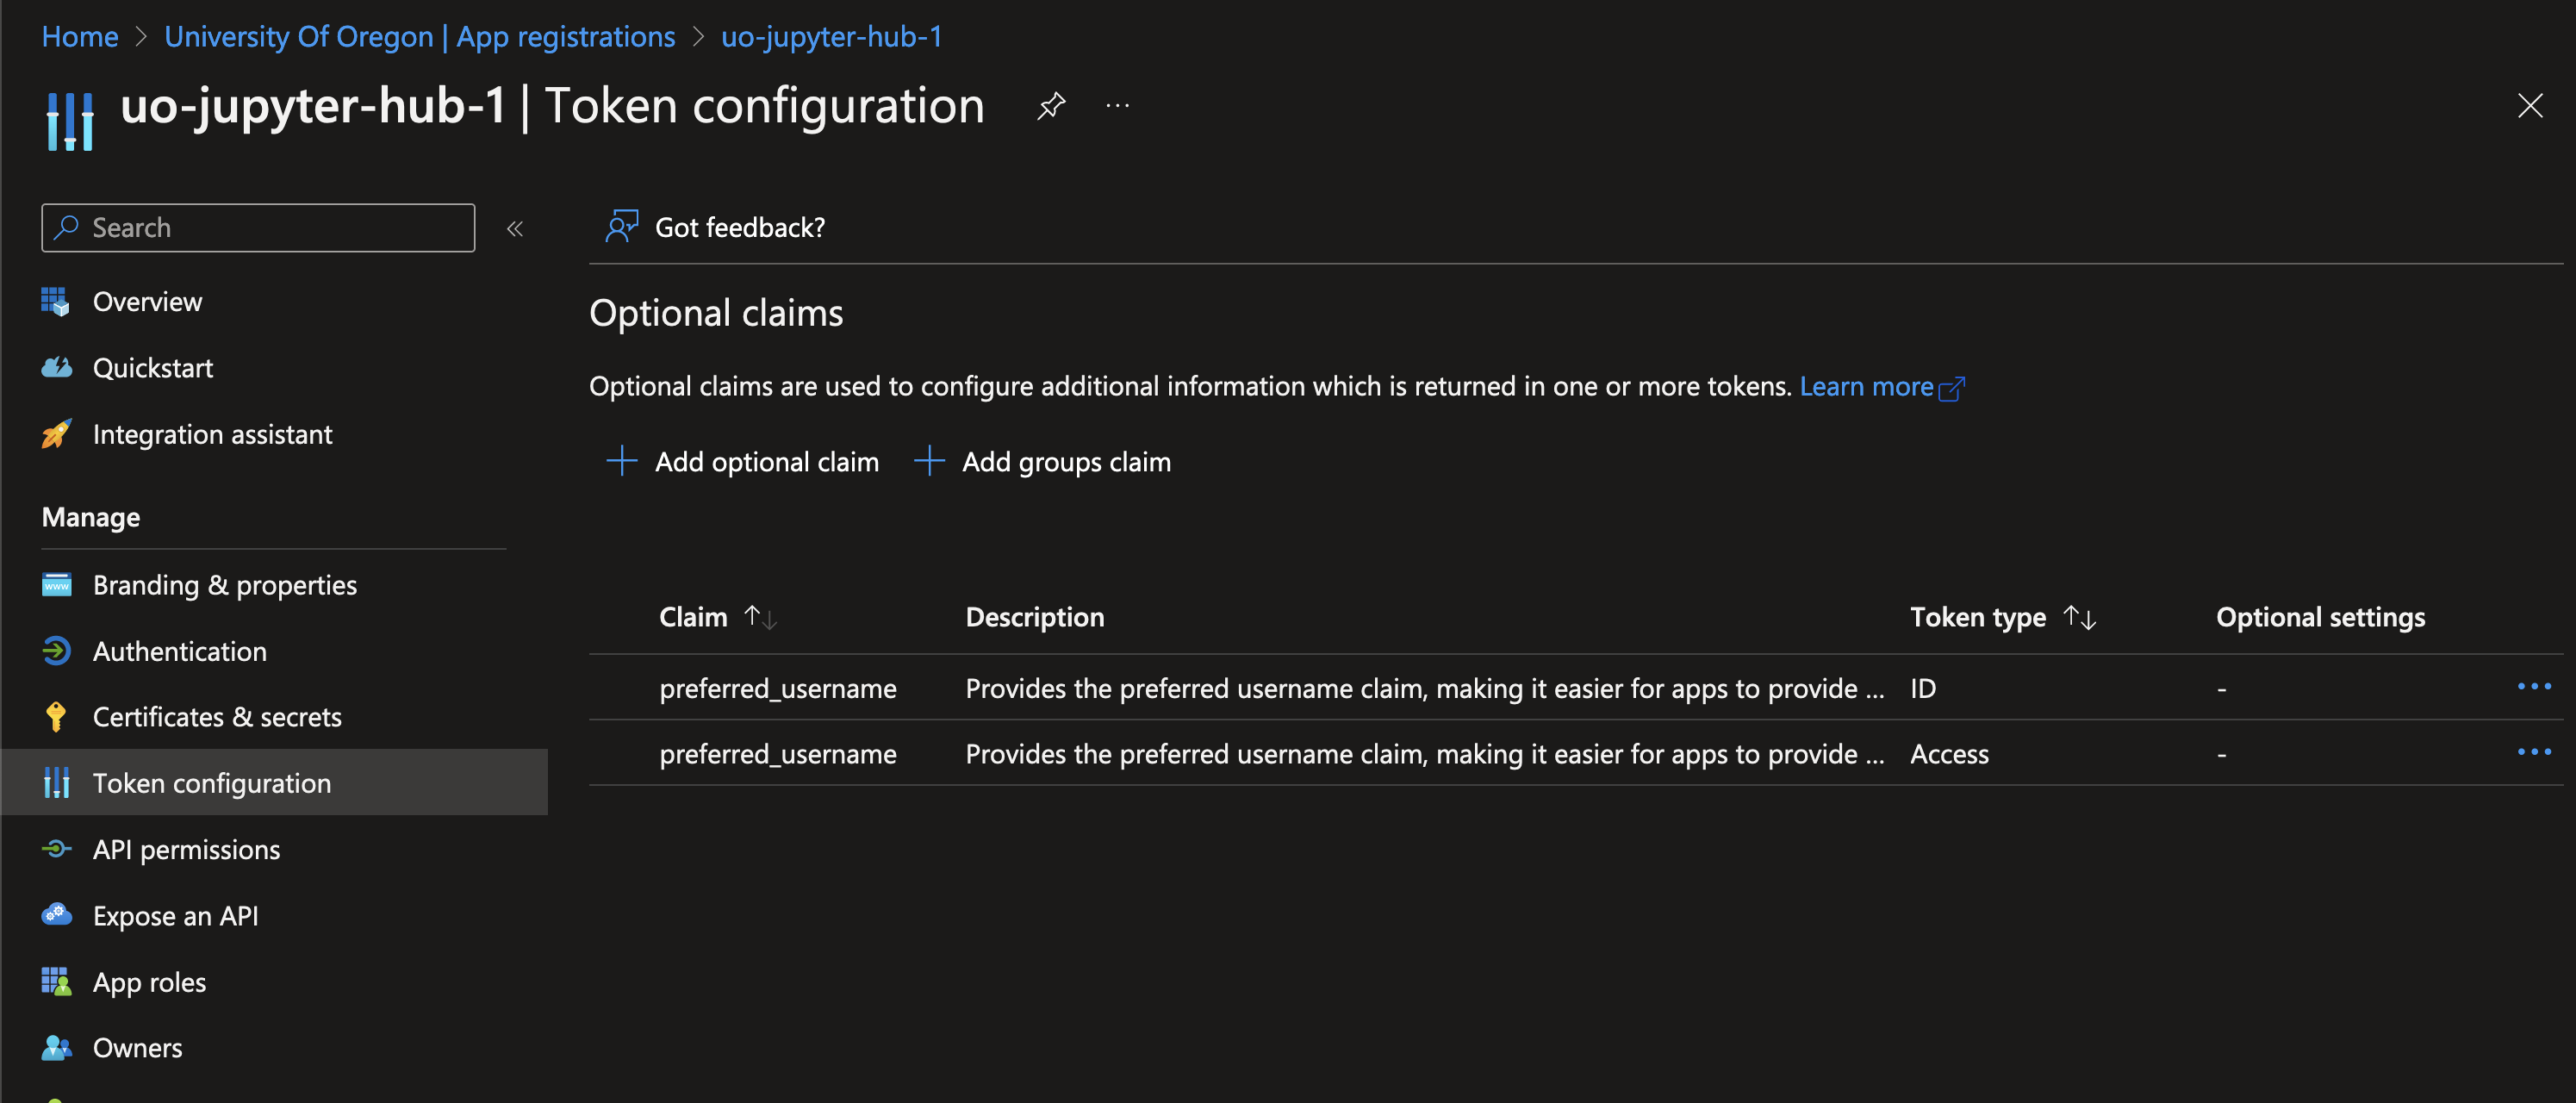
username_claim
We want Azure SSO to send our user’s username back to the Jupyterhub application, so we need to configure that attribute to be returned as an optional claim. Go to the “Token configuration” category and add two optional claims: one ID claim, and one Access claim, both returning preferred_username. I’m sure that I only need one of these, but it’s just easier to return both and not worry about it.
One step further
Now that your Azure SSO is configured correctly, you should be able to use it to log into your cluster, assuming the user access is set up correctly in Jupyterhub. Let’s configure the enterprise application to restrict access to just the users that are added to the application.
In the Enterprise Application, go to the “Users and groups” category.
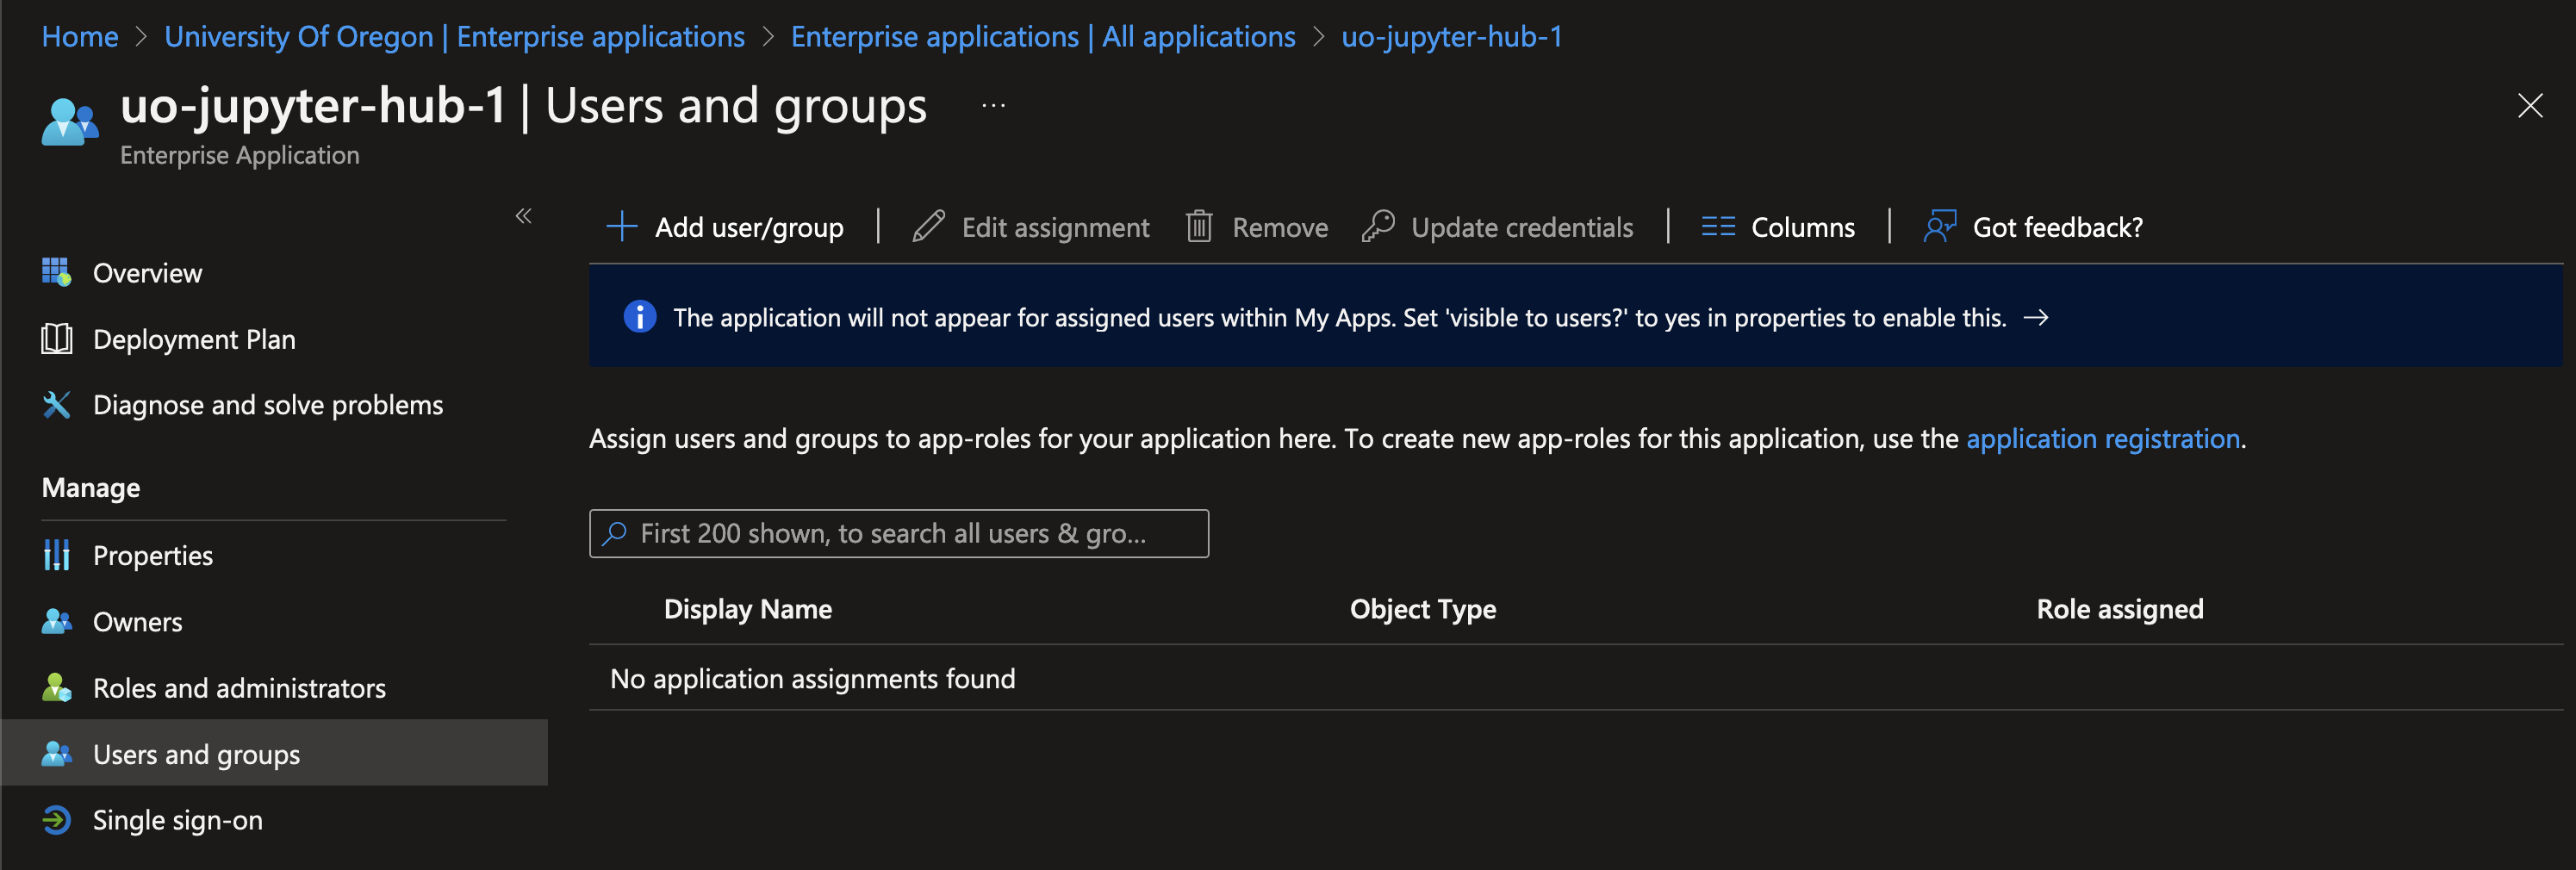
Add all your users to this list.
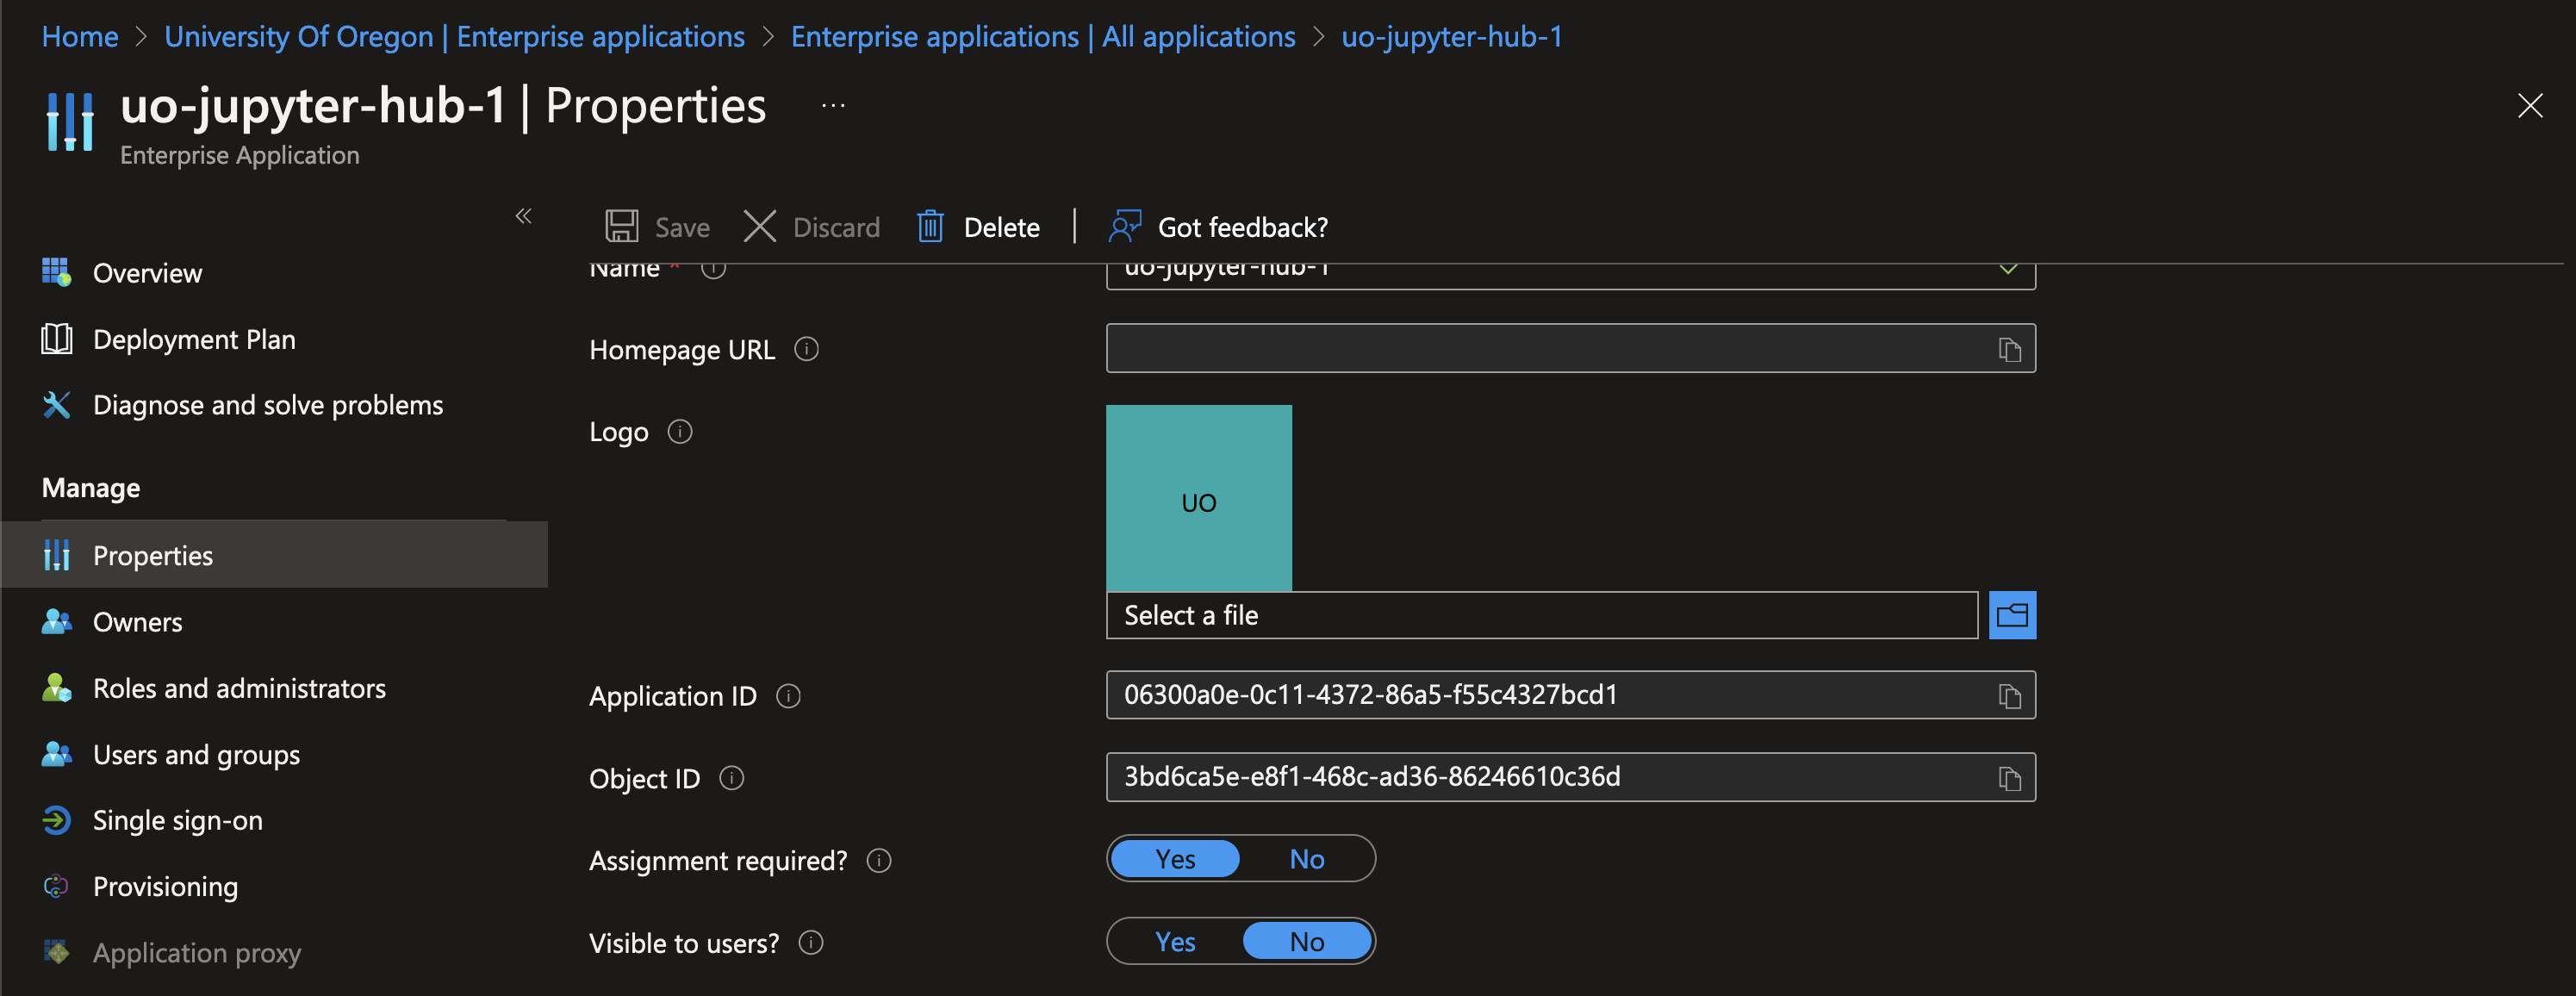
Beware, if your cluster is in production, your user list is not fully populated, and you continue, you will break access for the missing users. Navigate to the “Properties” category, and enable “Assignment required?”.
Tada! Azure is now configured for both Authentication and Authorization! You can now remove the explicit user list in Jupyterhub, effectively enabling all users, since Azure will now reject users who are not explicitly added to the Enterprise Application.
The last piece of this is automating the user management. Ain’t nobody got time to manually click and add all the users, so let’s build a solution to handle this for us using Azure Functions.
article pending